Difference between revisions of "Warp"
| Line 103: | Line 103: | ||
=== '''Applying an affine transformation to an image layer''' === | === '''Applying an affine transformation to an image layer''' === | ||
| + | <br /> Load the image layer to transform | ||
[[File:warpimage1.png|500px]]<br /> | [[File:warpimage1.png|500px]]<br /> | ||
| − | + | <br /> Load the base map (a vector or a WMS) | |
[[File:warpimage2.png|500px]]<br /> | [[File:warpimage2.png|500px]]<br /> | ||
| − | + | <br />Draw a line on the source baseline layer between two know points on the image layer | |
[[File:warpimage3.png|500px]]<br /> | [[File:warpimage3.png|500px]]<br /> | ||
| − | + | <br />Draw a line on the target baseline layer between the corresponding two points on the base map | |
[[File:warpimage4.png|500px]]<br /> | [[File:warpimage4.png|500px]]<br /> | ||
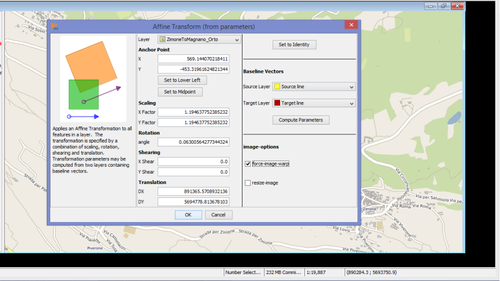
| − | + | <br />Open "Affine trasformation (from parameters)" plugin and set the option | |
[[File:warpimage5.png|500px]]<br /> | [[File:warpimage5.png|500px]]<br /> | ||
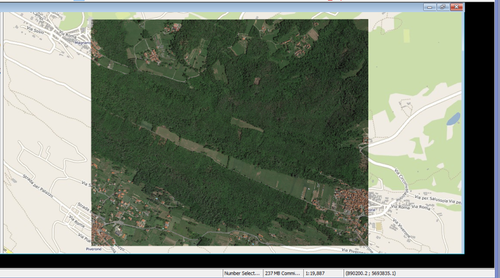
[[File:warpimage6.png|500px]]<br /> | [[File:warpimage6.png|500px]]<br /> | ||
Revision as of 16:30, 28 November 2017
back to Index page
Introduction
Warp tools can be used for the following tasks:
- To warp a vector drawing to a georeferenced map
- To georeference a vector drawing with unusual Coordinate reference system
- To move and geo-orient a group of objects on a map.
- To move and geo-orient an image layer on a map (only affine transformtion from parameters)
OpenJUMP provides different tools for warping. All these tools are available on Tools>Warp menu.
- Warping (toolbox): see also VIVID SOLUTIONs Jump Workbench User's Guide, page 41 to 43.
- Affine transformation (from warping vectors): see for details the Tools page
- Affine Transformation (from parameters): see for details the Tools page
The following tutorial is adapted from: “JUMP the Unified Mapping Project Workbench User’s Guide” Vivid Solution 2003 and describes how to use the Warping (toolbox).
Warping (Toolbox)
A warp is an algorithm for modifying all of the features in a layer, usually according to some parameters that are easy to specify, such as vectors.
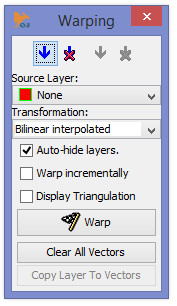
The Warping toolbox allows to make different transformations on vector layers:
- applying a bilinear interpolated transform (rubber-sheet warp)
- applying an affine transform
- applying a projective transform
Applying a bilinear interpolated transform (rubber-sheet warp)
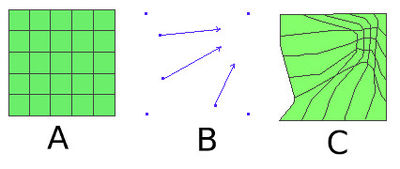
A rubber-sheet warp (or more precisely a bilinear interpolated triangulation warp) is a simple technique for deforming a dataset using a set of control point pairs7. Two triangulations are created: one using the source control points and one using the destination control points. Each source-triangle-destination-triangle pair implicitly defines a linear transform that carries each point on the source triangle to the corresponding point on the destination triangle. The dataset is transformed pointwise using the transform
associated with the source triangle in which each data point falls. Rubber-sheet warp in the following picture: (A) original dataset, (B) warping vectors, (C) warped dataset
To apply a Bilinear interpolated trasformation to layer
- Select Bilinear Interpolated in Trasformation combo box
- Select the layer to warp in the Warping toolbox
- Draw vectors representing the initial and final positions of the control points
- Press the Warp button
If you are surprised by the results of a warp, you may want to display the triangulation used so you can see how the source points map to the destination points
To view the triangulation used by the warp
- Select the Display Triangulation checkbox. Two layers will be generated, named Initial Triangulation and Final Triangulation
It can be easier to warp a layer little by little, rather than defining all the warping vectors before pressing Warp. Or perhaps you’ve warped a layer, but you want to warp it some more — in effect, you want to warp the warped layer. You can do this using incremental
warping.
To warp a layer incrementally
- Select the Warp Incrementally checkbox. The Warping Vector buttons will disable, and their corresponding Incremental Warping Vector buttons will enable.
- Draw warping vectors as before. You’ll see that the layer will be warped immediately after you draw each vector. You can hit Undo at any time.
You can switch midstream between incremental warping and non-incremental warping. If you want to start warping from scratch, simply press the Clear All Vectors button. If you have vectors stored in another layer and you want to copy them into the Warping Vectors layer, select the layer and press the Copy Layer To Vectors button. The Auto-Hide Layers checkbox will turn off the source layer when the Warp button is pushed. This checkbox will also turn off the layer containing non-incremental warping vectors during incremental warping.
Applying an affine transform
An affine transform is a linear transformation that is defined by the initial and final positions of three points. Depending to the number of points, the affine transform will translate, rotate, scale, flip, and shear the dataset so that the initial three locations are mapped to the final three locations. The following picture shows how to applyan affine transform, specifying: (A) one point, (B) two points, (C) three points
To apply an Affine trasformation to layer
- Select Affine in Trasformation combo box
- Select the layer to warp in the Warping toolbox
- Draw from 1 to 3 vectors representing the initial and final positions of the control points
- Press the Warp button
Applying a projective transform
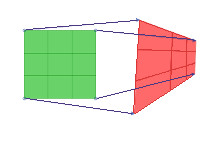
A projective transformation is defined by the initial and final positions of three points. It can be represented as transformation of an arbitrary quadrangle (i.e. system of four points) into another one.
The projective transformation does not preserve parallelism, length, and angle. But it still preserves collinearity and incidence. The original layer is not modified and a new layer is created. The following picture shows how to apply a projective transform, specifying four points
To apply a Projective trasformation to layer
- Select Projective in Trasformation combo box
- Select the layer to warp in the Warping toolbox
- Draw exactly 4 vectors representing the initial and final positions of the control points
- Press the Warp button
Affine transformation (with parameters)
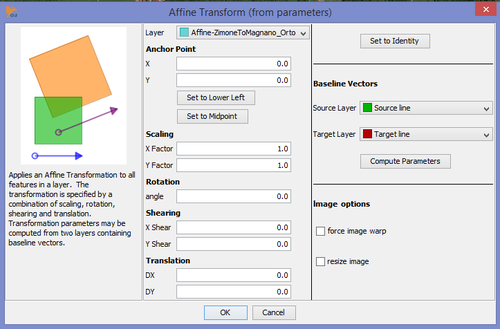
This tool applies an Affine Transformation to all features in a layer.
The transformation is specified by a combination of scaling, rotation, shearing and translation that can be defined manually with the insertion of the parameters in the boxes or they may be computed from two layers containing baseline vectors. These baseline vectors should contain only one linestring per layer.
Affine transformation (with parameters) plugin can geo-orient also an image layer by selection "Force image warp" on section "Image layer". Use "Resize imege to half to reduce the size of the image if transformation produces OS memory problems
Applying an affine transformation to an image layer
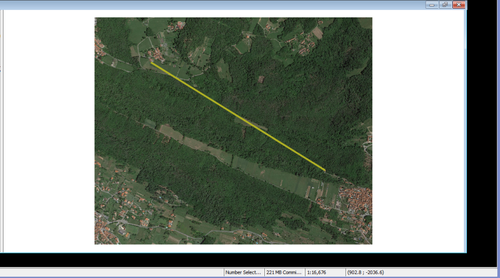
Load the image layer to transform
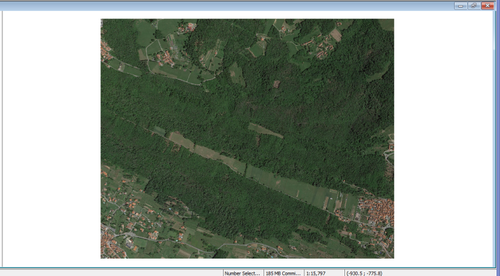
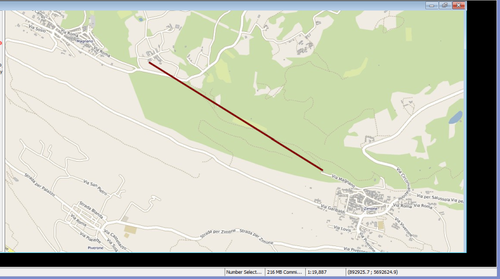
Load the base map (a vector or a WMS)
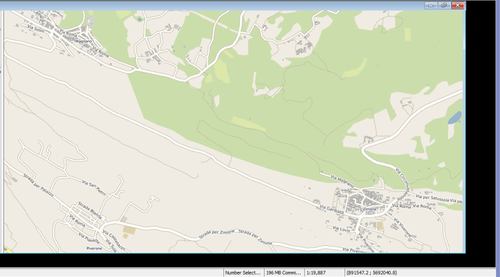
Draw a line on the source baseline layer between two know points on the image layer
Draw a line on the target baseline layer between the corresponding two points on the base map
Open "Affine trasformation (from parameters)" plugin and set the option
