Difference between revisions of "How to use a plugin with a properties file in ECLIPSE"
m |
|||
| Line 28: | Line 28: | ||
The first line is used to call external Plugins of the JUMP / OpenJUMP distribution. The second line is an option for language selection if you use Jumpi18n or OpenJump. In this case, it starts OpenJUMP in German. Finally the third line calls a file that loads all the tools that you would see in the 'Tools' menu in OpenJUMP, when you start a normal version. The last option works similar to '-properties' option outlined below. | The first line is used to call external Plugins of the JUMP / OpenJUMP distribution. The second line is an option for language selection if you use Jumpi18n or OpenJump. In this case, it starts OpenJUMP in German. Finally the third line calls a file that loads all the tools that you would see in the 'Tools' menu in OpenJUMP, when you start a normal version. The last option works similar to '-properties' option outlined below. | ||
| + | |||
[[File:12rundialogproperties.png]] | [[File:12rundialogproperties.png]] | ||
Latest revision as of 23:55, 27 March 2013
If you have created your HelloWorldPlugIn like in the section How to make your plugin in ECLIPSE then you can test (debug) it by loading it via use of a property file. This method is not a good way if you want to deploy your plugin. For this case see this section: How to create a jar plugin in ECLIPSE. There exists also a third case for including your plugins into Jump by modifying the JumpWorkbenchProperties.java file. But this way is not recommendable.
But lets start on "how to include your plugin code" into Jump:
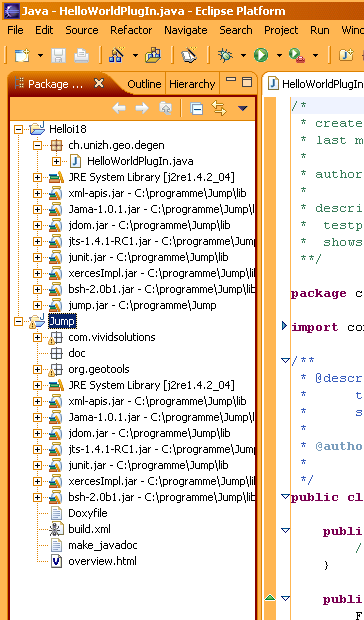
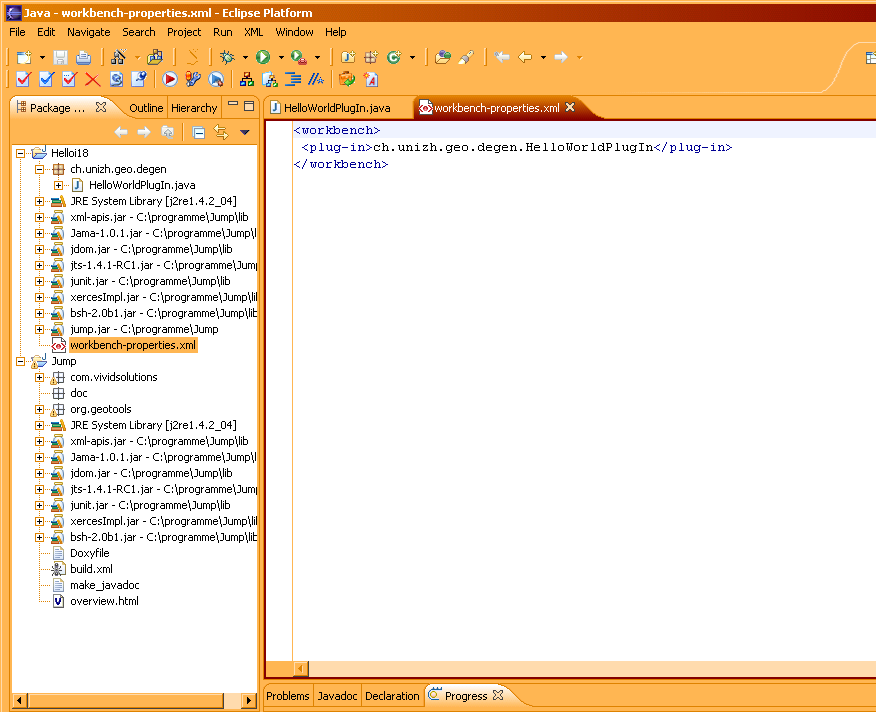
- 1 - For this method it is necessary to create a project containing the original Jump/OpenJUMP code. You can get the sources from the downlowad pages or the C-V-S repositories. After you have create the Jump/OpenJUMP project your project view should look like in the following picture. The project should not contain build errors - which may be caused by not included jar libraries (here use the project properties and the java build path option) or wrong java-path structures (wrong folder structure).
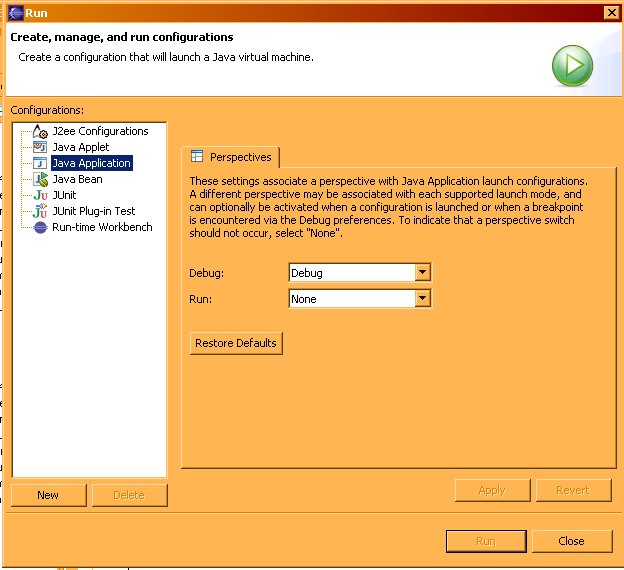
- 2 - The next step is to create a run entry for the Jump project. Therefore do right-mouse-click on the Jump / OpenJUMP folder and choose Run and select in the submenu the option Run... and a new dialog will pop up. Note: For debugging/testing use instead of Run the similar menu otpion called Debug (one below Run). Entries created with Debug can be used also by the Run option and vice versa.
- 3 - Select here "Java Application" and press the "New" button.
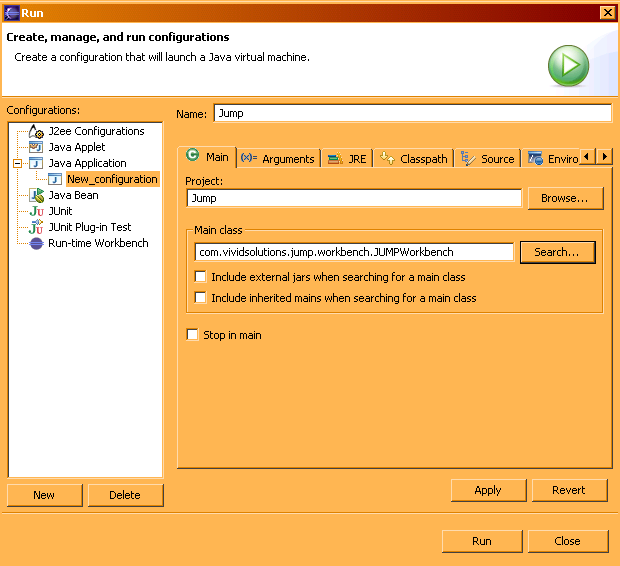
- 4 - Now go on the new created entry and fill the field name e.g. with Jump. Now click on the search.. button to define the entry class for Jump. Select from all the found classes com.vividsolutions.jump.workbench.JUMPWorkbench and press the Apply button. (see below)
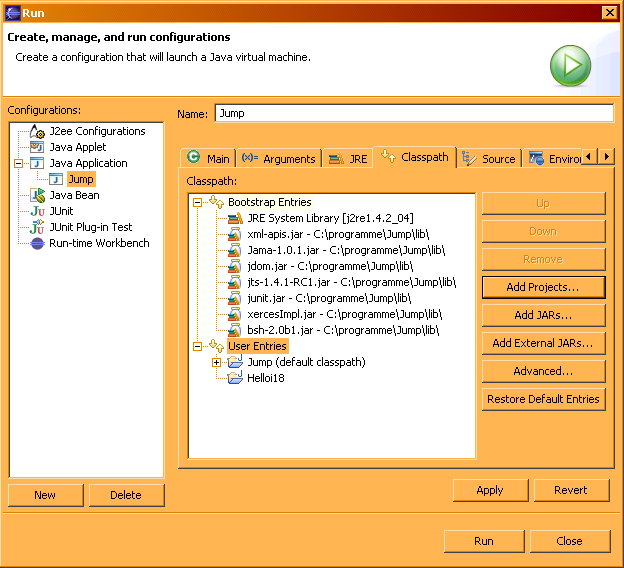
- 5 - Select the Classpath tab and add the libraries of the Openjump\lib\ folder of your normal installed OpenJUMP. Use therefore the option Add External JARs.. or Add JARs. (Have a look on the picture below)
- 6 - Further add also the Helloi18 project to the class path by using Add Projects.. button.
- 7 - Now press the Run button and OpenJUMP should start without any problems. If problems exists have a look on the messages which appear in the console window.
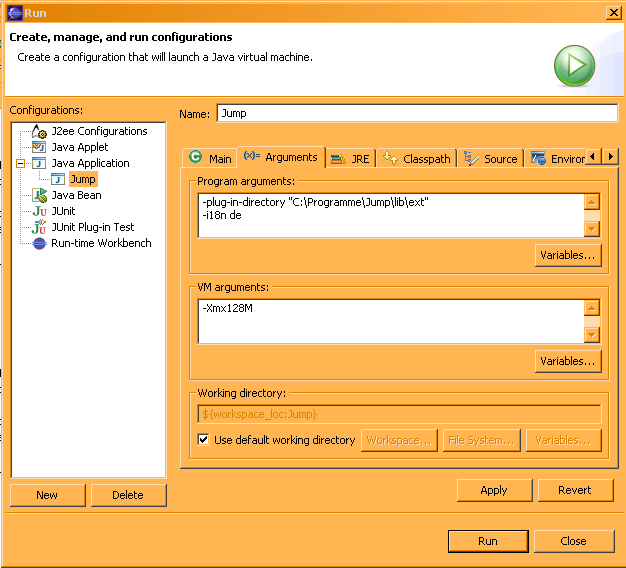
- 8 - If Jump starts without problems you should made some additional setting. Open therefore again the Run or Debug menu an select the appropriate entry (e.g. OpenJUMP) of the option Java Application. Select the tab Arguments and add under Programm Arguments the following lines:
-plug-in-directory "C:\Programme\Openjump\lib\ext"
-i18n de
-default-plugins c:\dev\eclwork\openjump_svn\scripts\default-plugins.xml
The first line is used to call external Plugins of the JUMP / OpenJUMP distribution. The second line is an option for language selection if you use Jumpi18n or OpenJump. In this case, it starts OpenJUMP in German. Finally the third line calls a file that loads all the tools that you would see in the 'Tools' menu in OpenJUMP, when you start a normal version. The last option works similar to '-properties' option outlined below.
If you have more memory than used by Java Virtual Machine then you can additionally add under VM Arguments (choosing the appropriate amount of memory):
-Xmx128M
- 9 - Now we will include our plugin code by using a properties file. Therefore we go to our Helloi18 project and have to create a new file called workbench-properties.xml. If Your eclipse does not give you the possibility to create a xml file you can either download one here or you create a new textfile with same name and rename the ending to xml. Note: the file should be put in the "top" path of your folder like you see below. If you have created the file not inside Jump (because you used the downloaded file), then you have to use the "Refresh" option of the project menu (or pressing F5 key)
- 10 - The workbench-properties.xml file should contain the following line.
<workbench>
<plug-in>ch.unizh.geo.degen.HelloWorldPlugIn</plug-in>
</workbench>
Thereby every entry between workbench must contain the correct java path and the Plugin Class. More than one entry can be defind like shown below:
<workbench>
<plug-in>ch.unizh.geo.degen.HelloWorldPlugIn</plug-in>
<plug-in>ch.unizh.geo.degen.LoadGPSPointsPlugIn</plug-in>
</workbench>
- 11 - Finally we have to say Jump that i should look up in the workbench-properties file to load our plugins. Therefore open the Run menu again. Select the Java Application option and your entry (OpenJump). Now go again to the tab Arguments and add the following entry (containing the right path):
-properties "D:\develop\openjump\Helloi18\workbench-properties.xml"
note: with newer Ecplise versions it may be necessary to omit the quotation marks
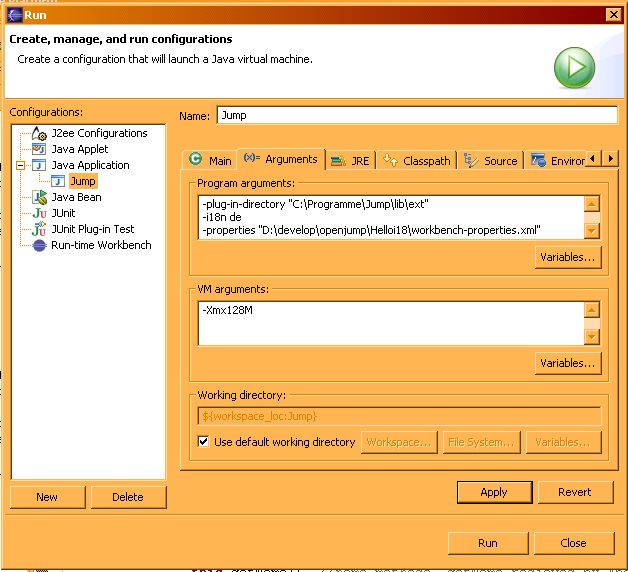
Since we have in the beginning also added our Helloi18 project as User Entry under the Classpath tab we can now press the Run or Debug button and our Hello World plugin should appear in Jump in the View menu.
et voila! Stefan (sstein)
